How to create custom Magento 2 homepage

Many visitors’ initial point of contact with the store is the homepage, which greatly decides whether they stay or leave. To meet the store’s objectives for sales and conversion, the homepage’s design is essential.
Several industry professionals recommend a custom Magento homepage that reflects the niche to increase conversions and income. Three steps are necessary to create a unique Magento homepage design:
- Block creation, first.
- Development of Product Categories.
- Including recently added products on the Magento 2 homepage.
Creating a Block for Custom Magento 2 Homepage
The development of Block is the first step in creating a custom Magento 2 homepage. When finished, the store administrators can add the appropriate shortcode for the Block to the homepage to display a banner.
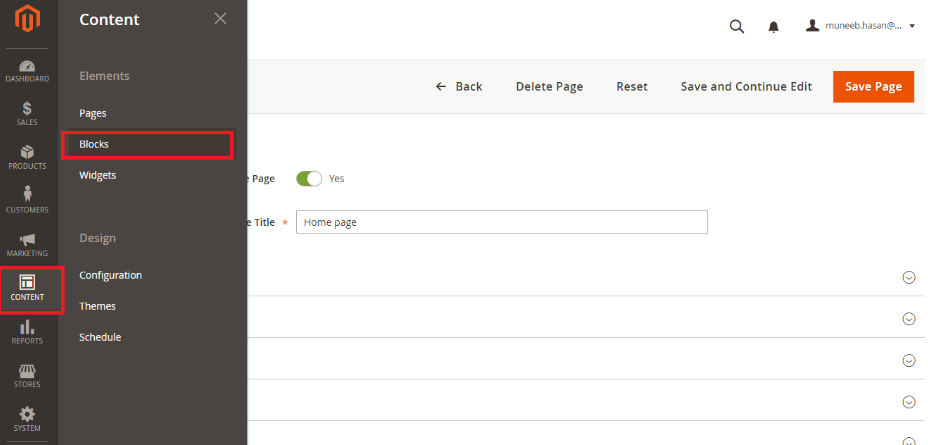
Go to the Magento Store’s Admin Panel and select CONTENT from the menu displayed on the left side of the screen. Then select BLOCKS from the menu.
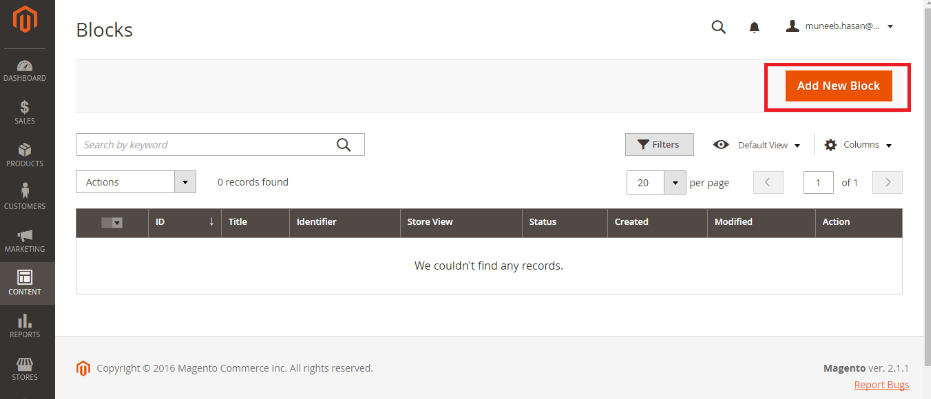
Click on the ADD NEW BLOCK option, which would be displayed on the next page.
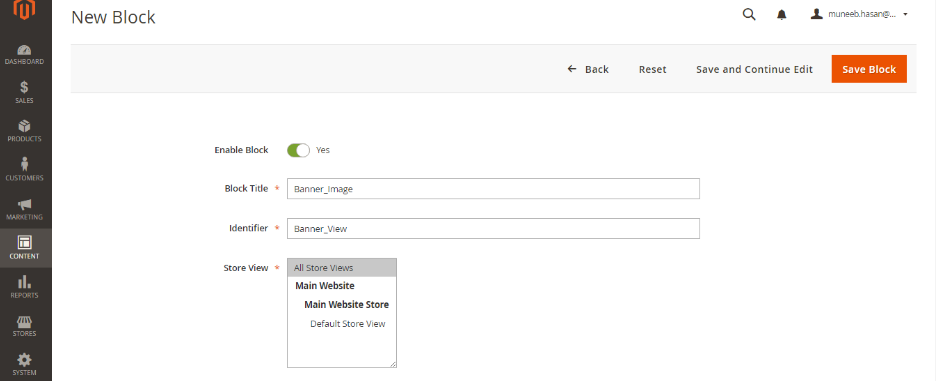
Add the Block’s details after that. Block Identifier (ID of the Block) and Block Title (Title of the Block) should be entered here (Id of the Block).
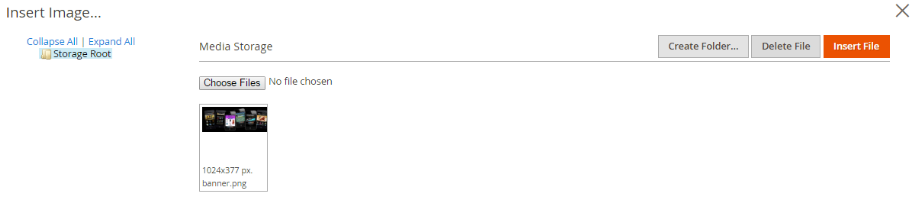
Once you have provided all of the details above, you can go ahead and upload the images in the Block
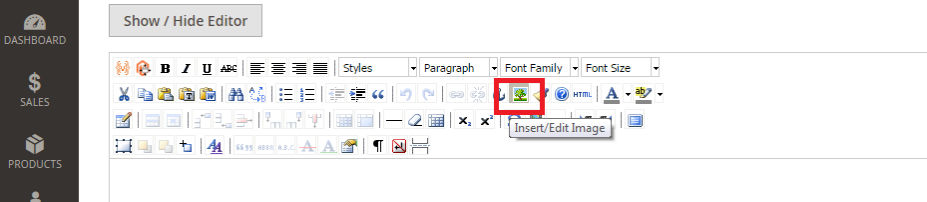
By selecting the BROWSE option, look for the image file. Check that none of the following fields are empty:
Image URL: The image’s path or URL.
Image description: An image description.
Title: Image’s title.
Go to the APPEARANCE tab if you need to alter the image’s design elements (dimensions, alignment).
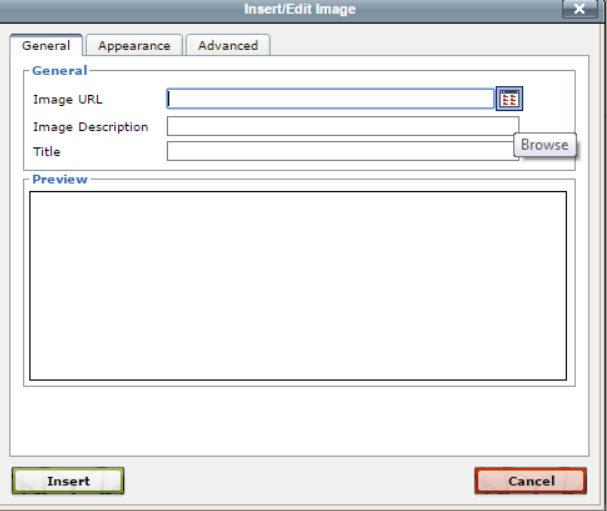
Once you are done, you can go ahead and click INSERT FILE.
Click on SAVE BLOCK to save the whole process when you are completely done with it.

At this point, you should have successfully created a new Block.
Making Products and Categories for a Custom Magento 2 Homepage
I’ll use a Magento store that sells a variety of mobile phones as an example in this tutorial to better understand this element for a custom Magento 2 homepage.
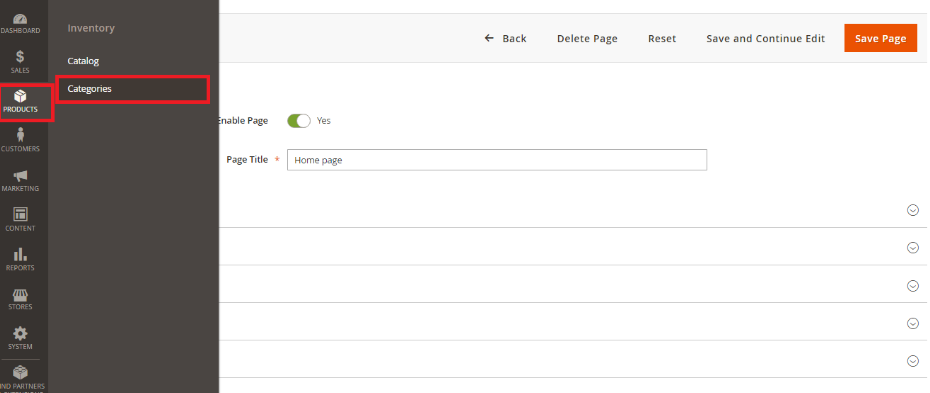
CREATING CATEGORIES
Navigate to the Products tab in the top left of the website, and then select the Categories tab.
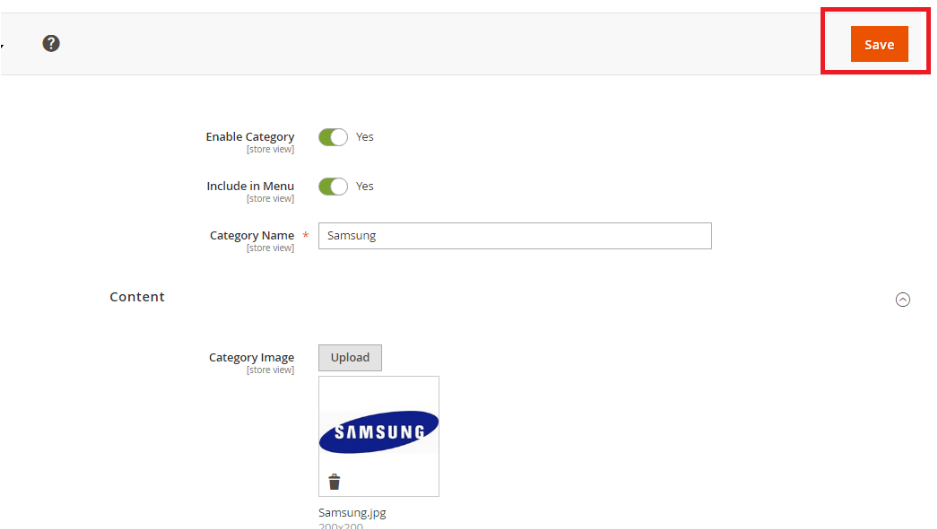
For example, SAMSUNG is the first category that must be created. As indicated in the image below, enter the category’s details and then click SAVE.
Add the following three categories: LENOVO, IPHONE, and NOKIA.
CREATING PRODUCTS
Another thing that you can do for a custom Magento 2 homepage, is create products. Select the CATALOG option under the PRODUCTS tab in the page’s upper left corner.

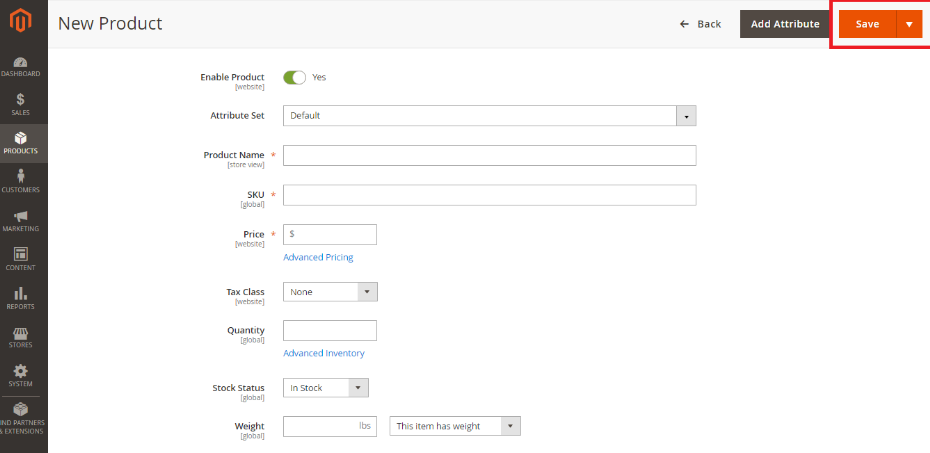
You can now select the ADD PRODUCT option

Enter the product’s information, choose the category for the product, and then press SAVE.
You can now easily and successfully create more products when you follow the steps mentioned above.
Block and product integration onto the custom Magento 2 homepage
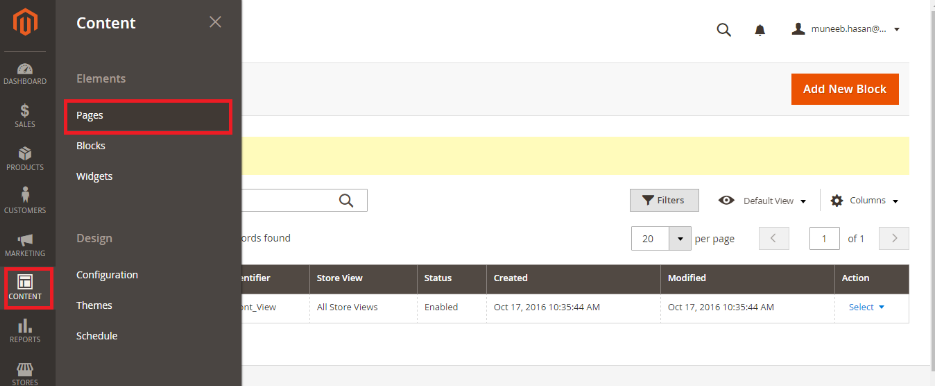
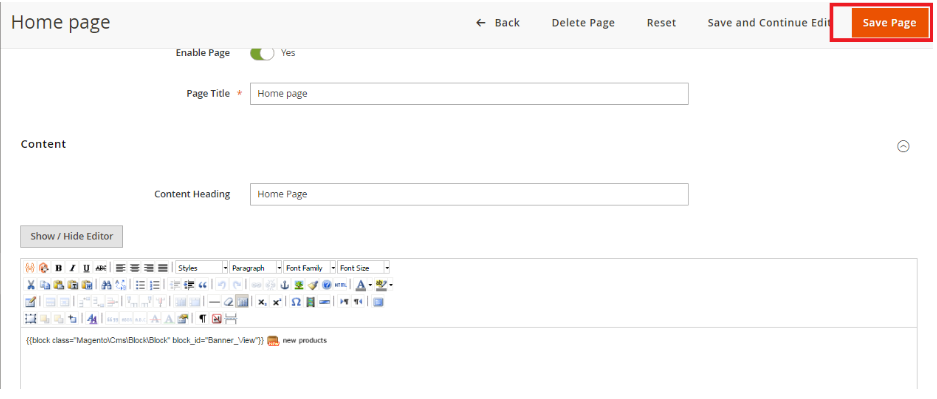
Go to the Magento store’s admin panel, select the CONTENT tab from the page’s top left corner, and then click the PAGE option.
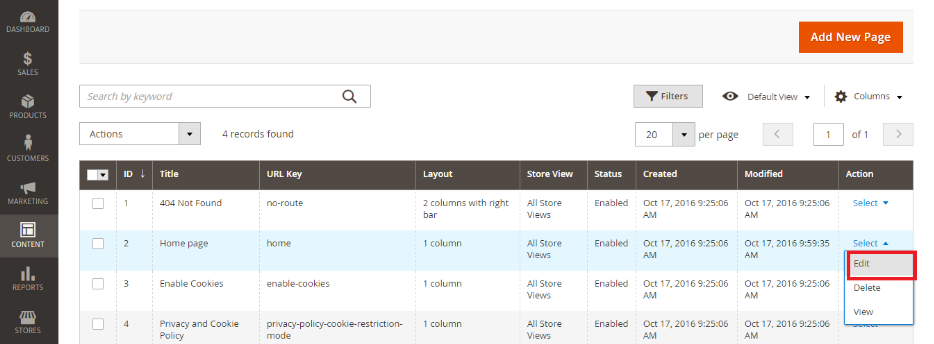
You can now click EDIT on the custom Magento 2 homepage
Now go to the CONTENT tab

Incorporating the Block
You can go ahead and use the following shortcode if you wish the Content Section to include the Block:
{{block class=”Magento\Cms\Block\Block” block_id=”Banner_View”}}
In the above-mentioned shortcode, Block_id is the exact ID that was used when the blog was created.
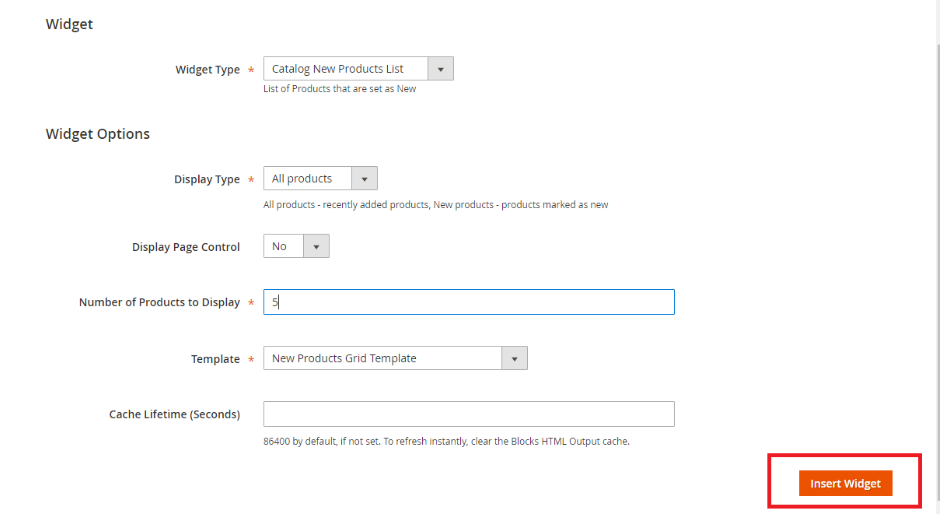
Product Integration
Click on the INSERT WIDGET tab to begin

From the listing, choose the Catalog New Products List, and then customize all of its features to meet your needs.
When this page (shown below) pops up, you can go ahead and click SAVE PAGE
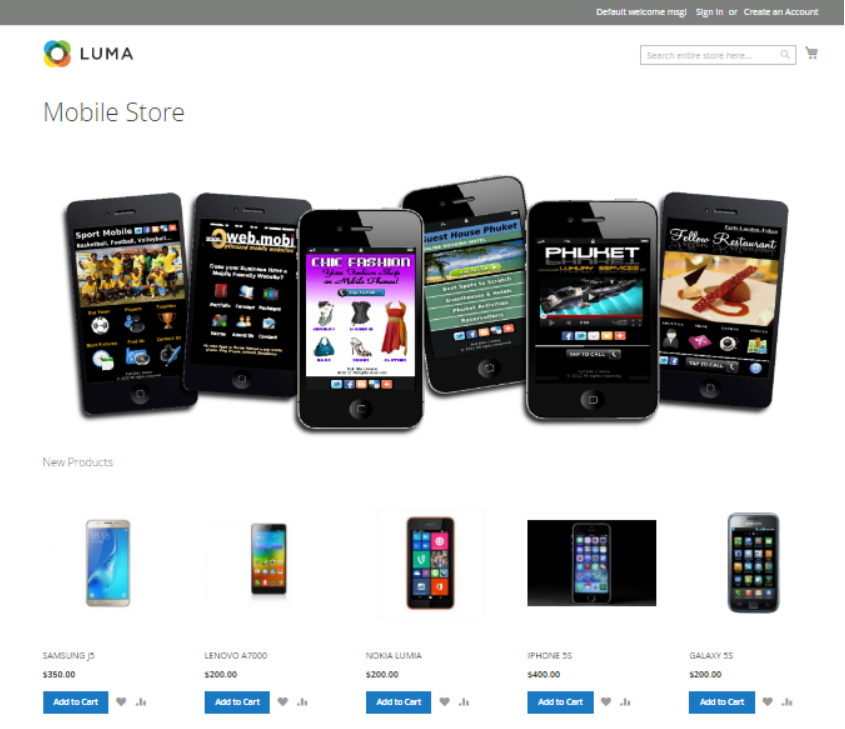
Visit the store now to see your custom Magento 2 homepage in full swing! The custom Magento 2 homepage is now ready!
An essential component of the entire store promotional strategy will be a custom Magento 2 homepage. I’m hoping it won’t be difficult for you to follow the procedure’s straightforward steps.
Loading problems may arise while working on backend or frontend development. For this reason, it’s crucial to select a reliable Magento hosting provider that ensures quick response and loading times.
Was this helpful?